In this Article. I’ll work you through on how you can simply and easily connect your woocommerce store to Paypal without getting rejected!
Woocommerce payment setting gives you an option to connect your Paypal account via a Paypal Plugin developed by Woocommerce but I like to avoid that, simply because it takes you through a rather long and confusing process of applying for Paypal exclusives, credit and debit cards and local payment methods.
The annoying thing is you could get rejected after that application, your Paypal account could also be limited after that application especially if you were making that application from a Paypal restricted country.
You’ll be required to provide a US or Canada customer care number, which isn’t like the regular Sim card or Voip phone number and many small e-commerce businesses don’t have it!
It’s no surprise why the Paypal plugin made by woocommerce only has a one star rating on the wordpress.org repository.
Most of the time, what many e-commerce businesses want is simply to connect Paypal to their woocommerce site and offer it as payment option so that customers can get redirected to their Paypal account to check out,
e-commerce stores also want to be able to display Paypal button on their check out page and offer Paypal credit card processing so that customers can pay via their credit card.
So, here are quick and easy steps to connect Paypal to woocommerce and display Paypal buttons without getting rejected;
- Install and activate the WebToffee PayPal Express Checkout Payment Gateway for WooCommerce by WebToffee
- Get your Paypal Client ID and Secret; to do this you’ll need to have a verified Paypal Business Account. If you’ll like to learn how to create a verified Paypal Business account even from a limited country, check out this Articol.
- Login to your PayPal business account.
- Go to Activity > API Access OR from Account Settings > API Access.
- Scroll down to the REST API Integration section and click Manage API apps and credentials. The REST API apps window opens up.
- Click on the PayPal Developer experience link to create or manage apps.
- Next, Login to developer account or Signup a new developer account. Click on the create a new application or default application for your business account. Then, copy the Client ID and Secret.
- Paste the Client ID and Secret in the respective fields of the WebToffee PayPal Express Checkout Payment Gateway plugin settings
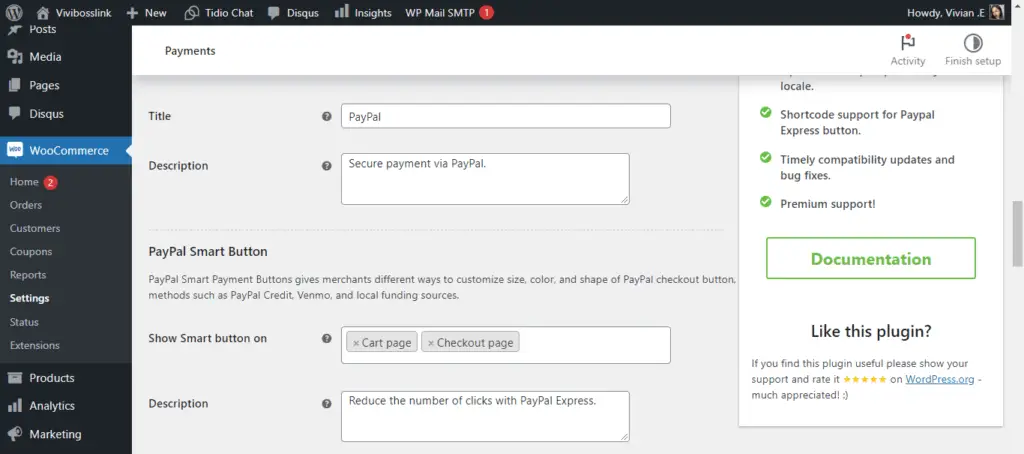
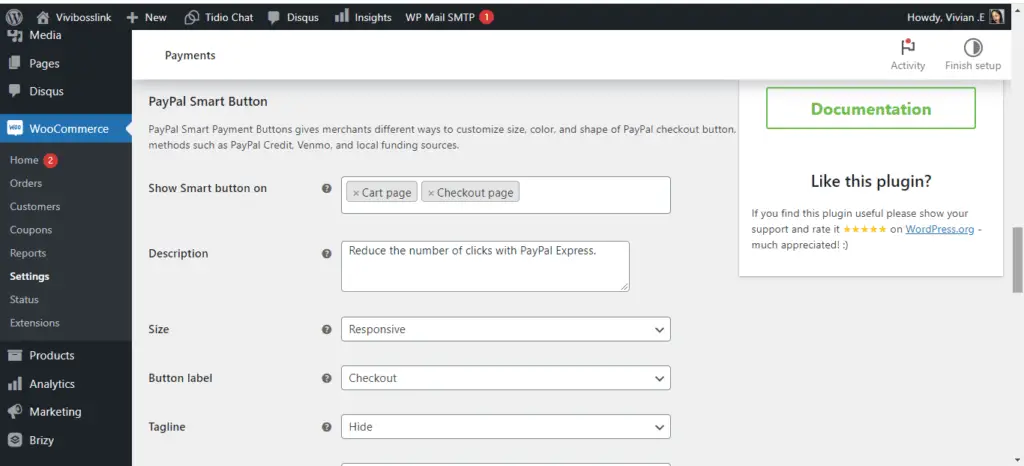
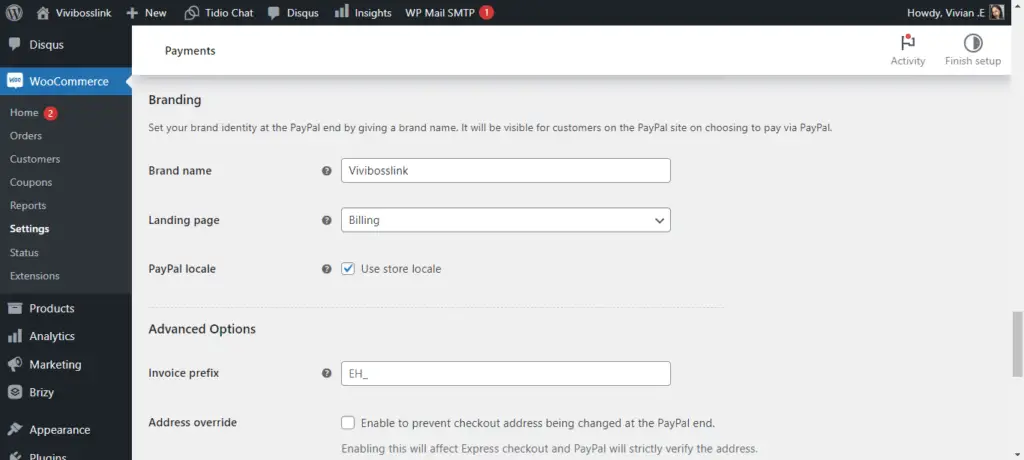
- Edit the rest of the settings field to your branding and preference, for example. Look how I edicted mine in the below screenshots;
If you have any questions about this topic, feel free to use our forum for prompt and free support on article topics or any other e-commerce tutorial subject. Please refrain from messaging our social media pages, as our forum provides the quickest response time.

For personalized consultation, we offer one-on-one comprehensive consultation for e-commerce entrepreneurs looking to start up a US LLC. This covers various aspects, including determining if it's a good move considering your specific business profile, selecting the most favorable state for LLC registration, understanding and navigating annual returns and tax obligations, setting up a TikTok shop while staying compliant with TikTok Shop terms of service even if you reside in an unsupported country, obtaining US EIN, ITIN, and business permits specific to your business, and other related US e-commerce startup subjects.
Sessions are tailored for both US and non-US residents, priced at $25 per 30 minutes.

Our goal is to help you understand your US startup compliance requirements so it can be aligned with your overall business plan.